Documentation · SitePublisher AI Pro
Create and manage Tier 2 links.
Generate supporting articles that link to a published main article. Set a destination for each row and follow its progress through generation, image creation and WordPress publication.
Pro 2.3.1 · Up to 10 supporting articles per main article
Before you start
Prepare the main article and destination profiles.
Connect OpenAI and check the websites in Website Settings. Save a valid default category, language and article settings for every destination you intend to use.
A published main article
The main article needs a complete public URL and relevant keywords. Tier 2 links point back to that URL.
A website for every row
Each supporting row needs an explicit destination. Its category, language and article structure follow that website’s saved defaults.
Text and image generation
Tier 2 creates a new title, article and AI featured image. Generation uses your connected OpenAI account and is billed separately by OpenAI.
Inside SitePublisher AI Pro
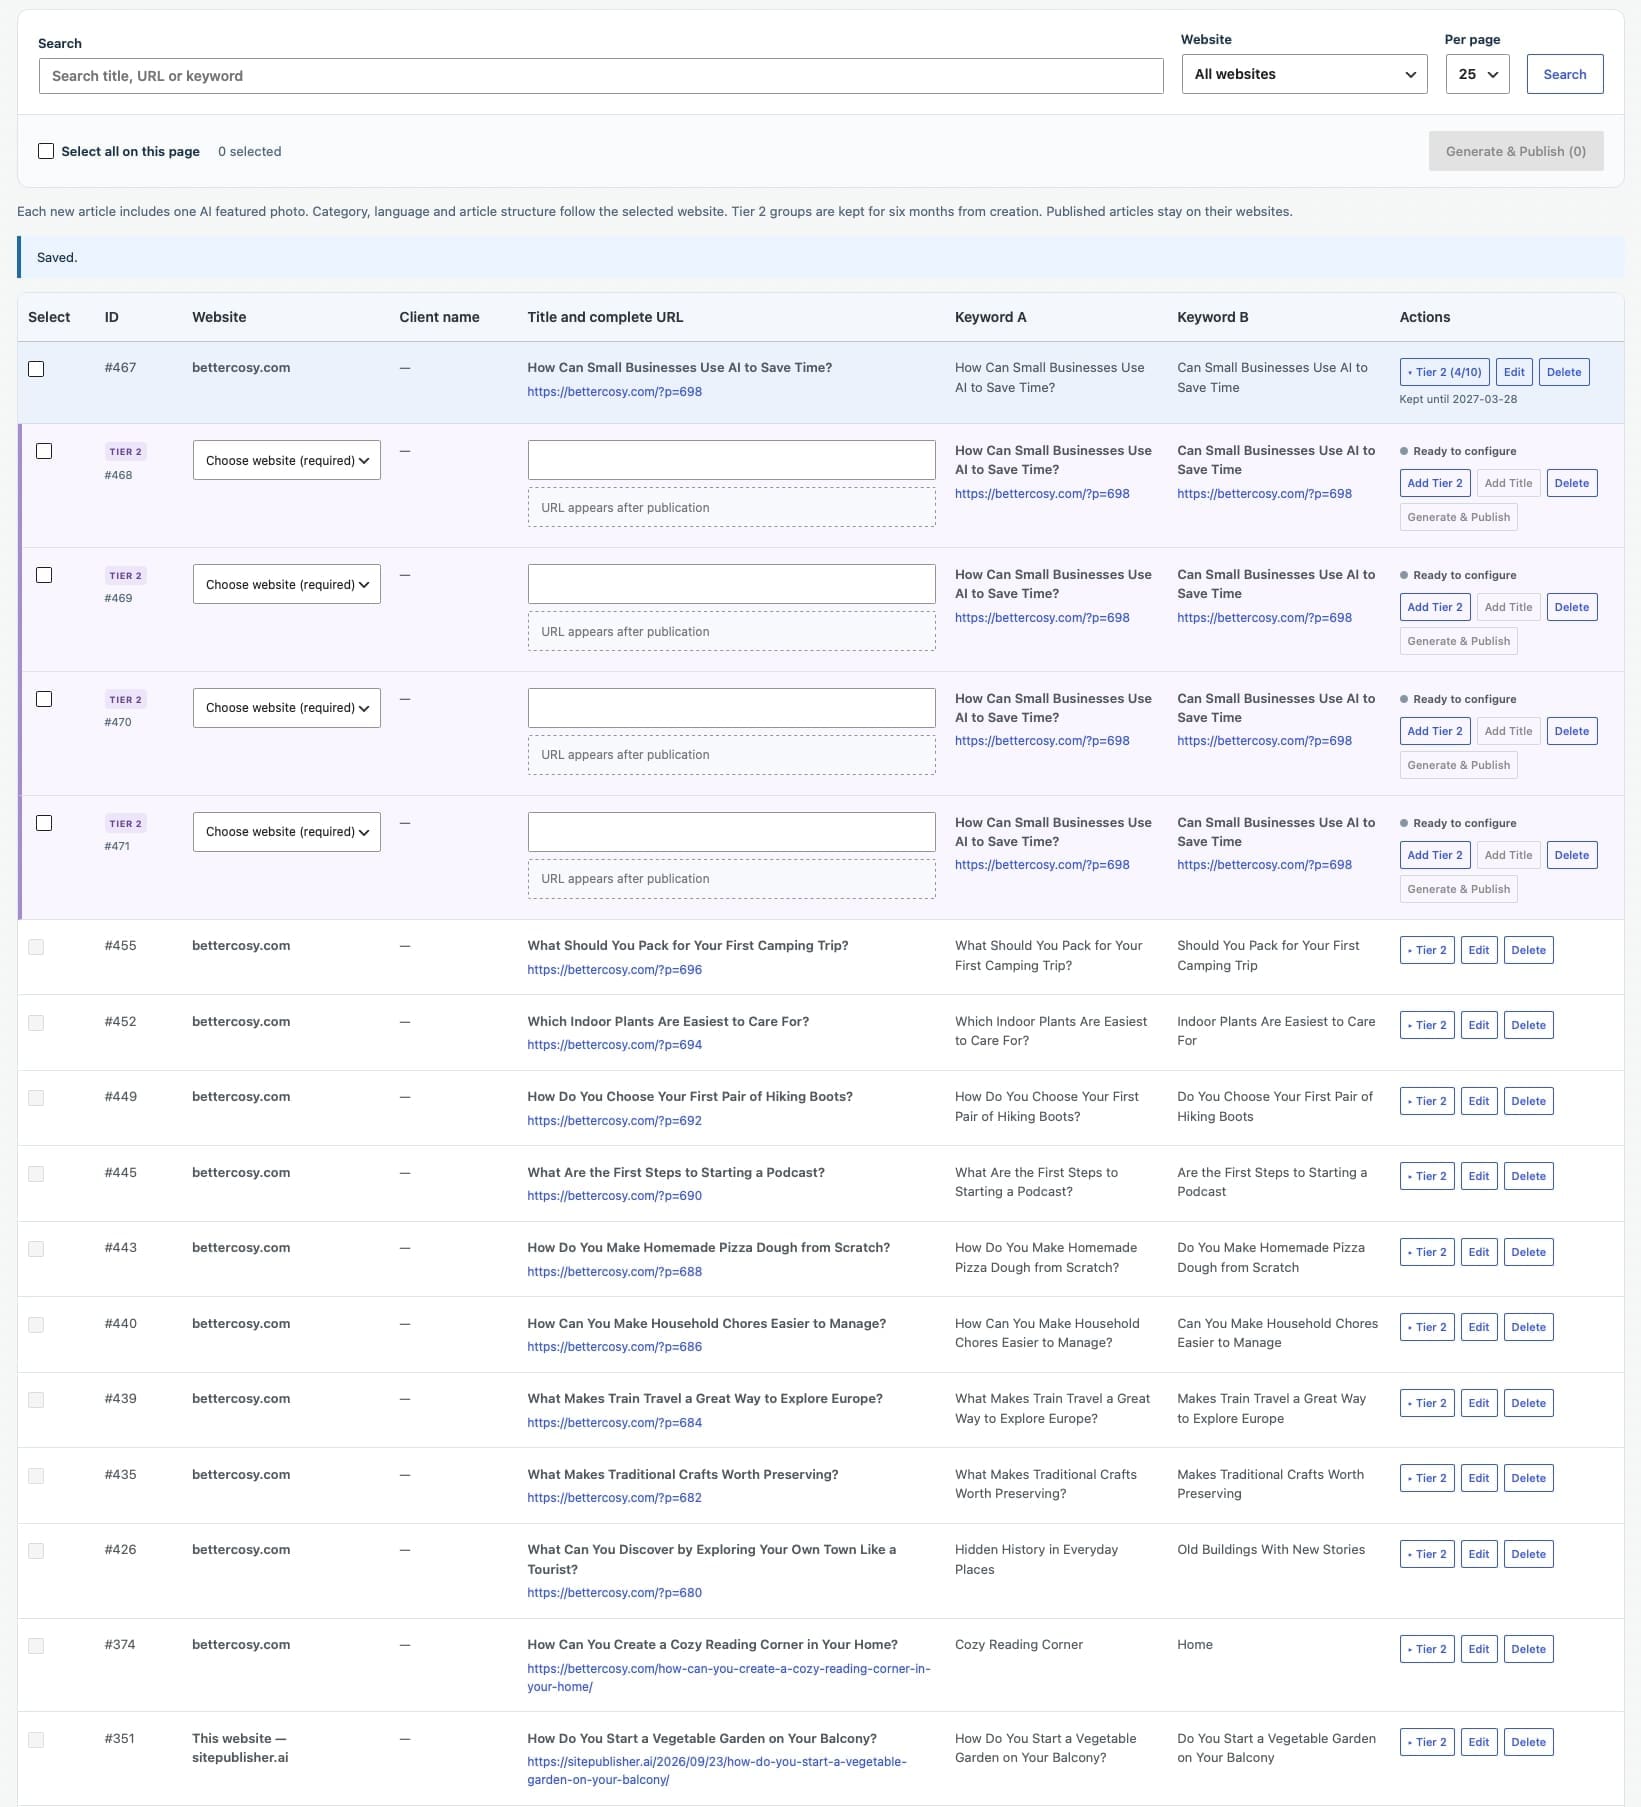
See the complete Tier 2 Links workspace
Explore the full screen below. Click the image to open the original and zoom in on any field.
Route 1 · Existing articles
Open the main article in Tier 2 Links.
Go to SitePublisher AI → Tier 2 Links. Find the main article from Link & Keywords using the title, full URL or keyword search. Filter by website when needed.
Expand the main article
Choose Tier2 on its row. The supporting rows appear underneath in a distinct, lighter area.
Add supporting rows
Use Add Tier2 to add rows, up to ten for one main article. Select a website for each row you want to generate.
Check the inherited details
The client is inherited when present. Keywords link to the main article’s URL. The supporting title and its own publication URL are filled as the job progresses.
Generate and publish
Use Generate & Publish on a row, or select eligible rows on the current page and use the page action. Every selected supporting row must have a destination website.
Open the published result
After publication, the row shows the new Tier 2 title and complete public URL. Open the URL and check the article, image and links.
Route 2 · Single Article
Include supporting articles in the original brief.
Prepare the main article as usual. The optional client selector sits beside Destination website; leave it empty when the work is not for a client.
Enable Tier 2
Check Create Tier 2 articles after publishing (optional). Choose a website for the first supporting article and use Add Tier 2 article for more, up to ten.
Review and publish the main article
Add the brief to the queue, review its text and images, then publish it. Saving only a draft does not start the supporting publications.
Track supporting jobs
After the main article is successfully published, supporting jobs appear in Tier 2 Links. They use its confirmed URL and the selected destination profiles.
Status, selection and retention
Read the status before retrying.
Publication status
- Blue: generation or publication is in progress.
- Green: the supporting article is published.
- Red: an error needs attention. Read the message and correct its cause before retrying the same row.
- Check the destination first if a message indicates that publication may already have succeeded.
Keep the workspace manageable
- Choose 25, 50 or 100 records per page.
- Select all applies to the current page.
- Tier 2 records are retained for up to six months.
- Deleting or expiring a local row does not delete the published WordPress article.
Clients & Gigs
Include the supporting articles in your client report.
When a client is assigned, published main and supporting articles appear under that client. Review full URLs, up to five keyword and URL pairs, and the parent article relationship. Generate a PDF for one row or selected results.